


Thanks to the rise of Hyrox, more people are waking up to the fact that the sled push isn’t just a brutal test of strength—it’s a powerhouse exercise for building full-body power, endurance, and athleticism. Whether you're prepping for race day or just looking to add some hybrid-style training to your routine, mastering the sled push can level up your performance like nothing else.
In this guide, we’ll break down the key techniques for an efficient and powerful sled push, the best exercises to build strength and speed, and tactical tips for those taking on the Hyrox sled challenge.
No matter your starting point, there’s always room to improve. Let’s get pushing.
Managed to get a Hyrox place and need some guidance with the training? We’ve got you covered. Access our 10 week Hyrox prep training plans on the Gymshark Training App (and did we mention it’s absolutely free?).
What Is The Sled Push?
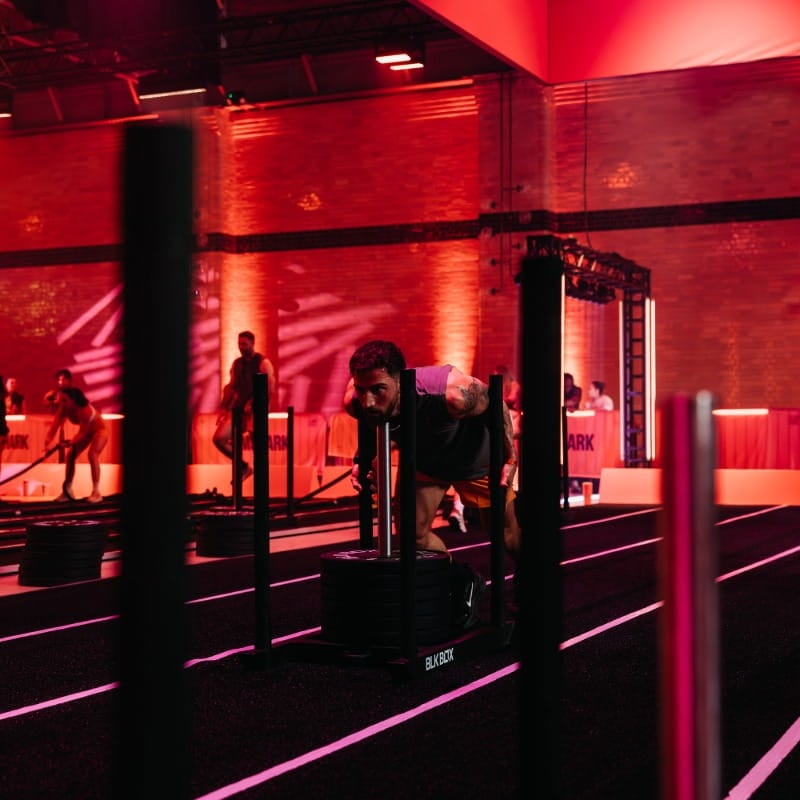
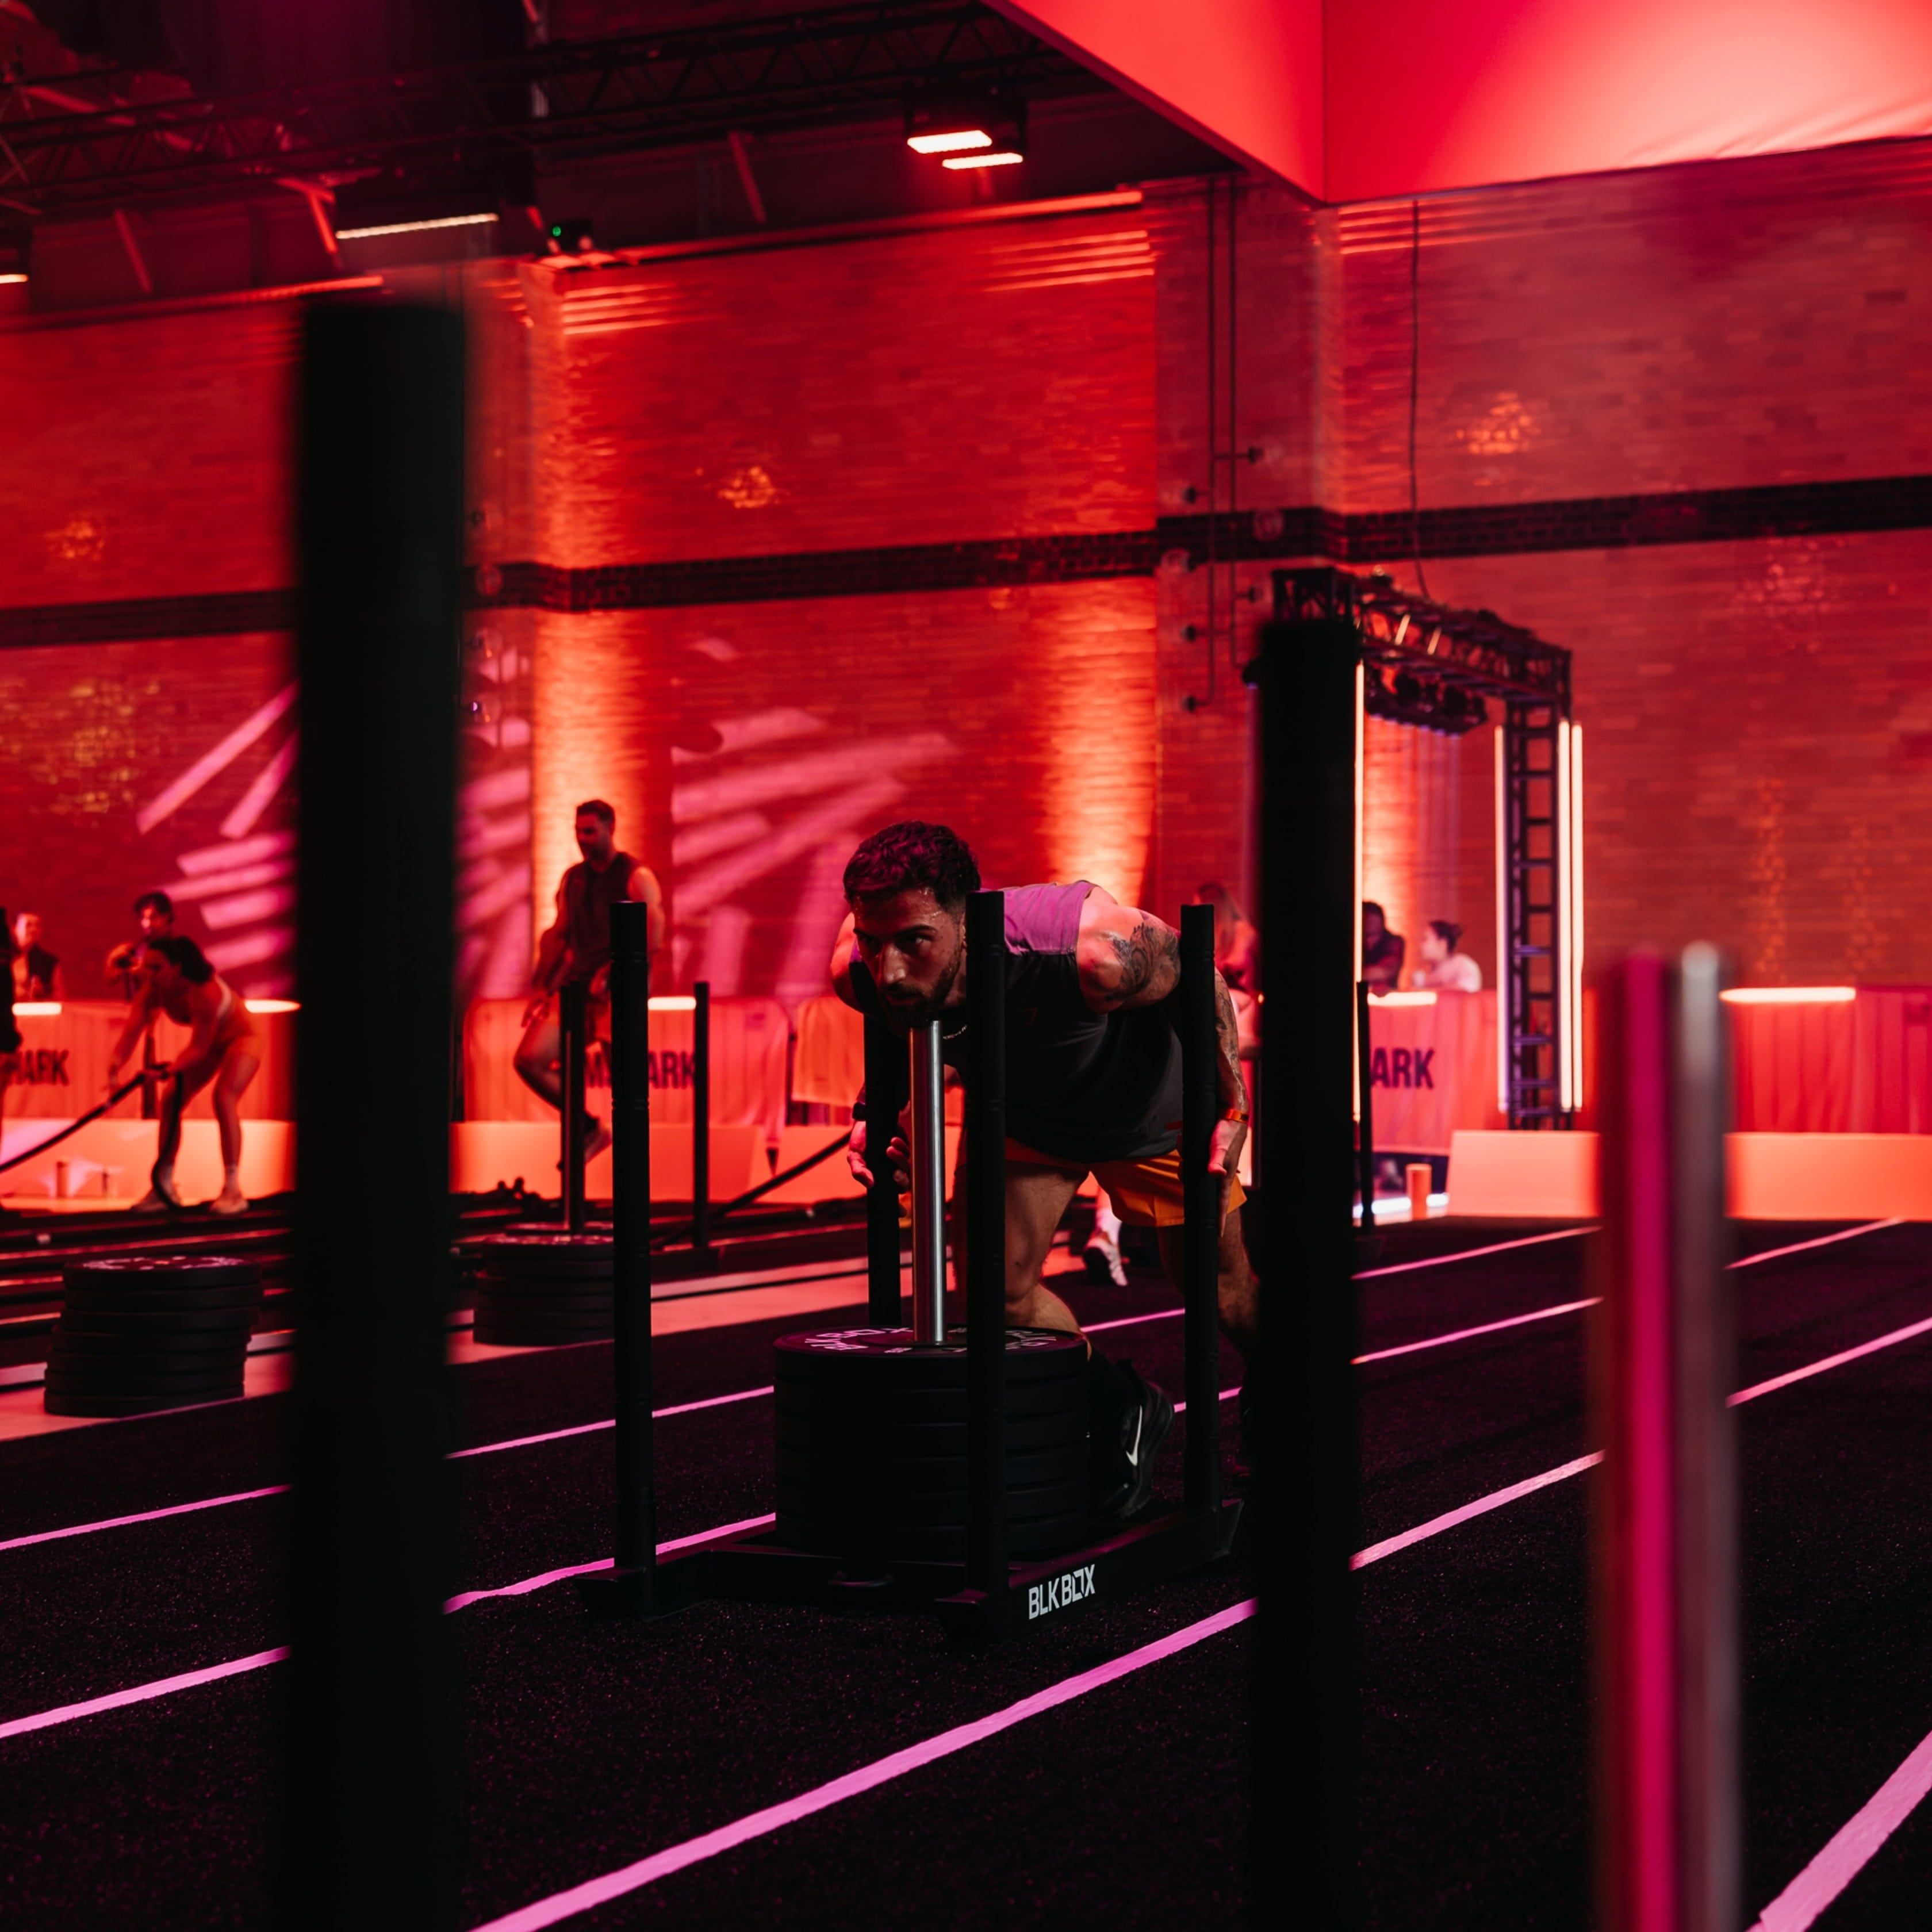
The sled push is one of the most effective full-body exercises for building strength, power, and endurance.
It involves driving a weighted sled across a surface—usually turf or rubber flooring—by leaning into it and pushing with your legs in a powerful, controlled motion. Weight plates are added to the sled to increase the resistance–the heavier the load, the more strength and power is required to shift it.
Its rise into the mainstream can be largely credited to Hyrox, which features a 50m sledge push as the second station. It’s notorious for being one of the most difficult stations, requiring good technique, sheer strength, and mental resilience.
Whether you're an experienced lifter or new to hybrid training we’re here to give you the steps, skills, and techniques to push the sled with power and confidence–and it all starts with the basic steps and technique.
How To Do The Sled Push
The sled push has three main techniques you can use. These are:
The straight-arm technique
The bent arm technique
The full contact technique
The latter of the three is by far the most popular. However, each has benefits and drawbacks, which we will explain. You might choose to use one or all of these techniques on race day, switching between them at set intervals. You should practice each technique during your training so that you know exactly how you will tackle the sled push on race day.
1. Straight Arm Technique
How to do the straight arm sled push technique:
Standing behind the sled with feet shoulder-width apart, hinge at the hips and place your hands on the upper handles in a neutral grip. Make sure your arms are straight before you start to push the sled.
Keep your arms straight with your elbows locked out, brace your core, and maintain a neutral position with your head. Drive the sled forward by pushing the floor away with the balls of your feet.
Take small, controlled steps to continue moving along the track, trying not to stop (momentum will help you, while stopping will mean you have to exert extra energy to get the sled moving again from stationary). If you do have to stop, try to be consistent, e.g., stop halfway for a few seconds, then continue to the end of the track rather than stopping sporadically.
Push the sled until it is entirely behind the 12.5m mark. Then let go, walk around the other side, and take hold of the sled from the opposite end to push it back in the direction you’ve just come.
Then, move away from the sled, and come around the other side. Repeat the same steps, pushing the sled in the opposite direction.
Benefits: Shorter people often find this technique more comfortable and powerful, as they may find they are too low on the poles using a bent arm technique.
Downsides: Maintaining straight arms while pushing the sled can put a lot of strain on the shoulders and lower back. Longer lever arms also potentially reduce the force you can produce to push the sled.
2. Bent Arm Technique
How to do the bent arm sled push technique:
Grip the sled on the upper third of the sled poles.
Lean into the sled, bending your arms to bring your shoulders towards your hands (but not so close that they make contact). Your shoulders should align with your hands, head over the sled, looking down to maintain a neutral spine.
Bracing your core, begin pushing the sled by driving the balls of your feet into the ground.
Take small, controlled steps to continue moving along the track, until the sled until it is entirely behind the 12.5m mark.
Then, move away from the sled, and come around the other side. Repeat the same steps, pushing the sled in the opposite direction.
Benefits: During this technique, your body is more parallel to the floor, allowing you to put all your weight into the sled for stronger, more powerful pushes. For this reason, competitors often find this position more powerful than the straight-arm position, particularly when pushing heavy loads.
Downsides: Some may find this technique very taxing on the shoulders. It could lead to greater upper-body fatigue.
3. Full Contact Technique
How to do the full contact sled push technique:
Place your forearms on the upper third of the sled poles, fingers facing down, wrapping your hands around the poles.
Lean into the sled, pushing your shoulders through so your head and shoulders come over the middle of the sled. Put as much weight over the sled as you can.
Keep a neutral spine and a tight core as you drive through the balls of your feet and press into the sled poles to move the sled.
Continuing taking small, controlled steps, along the track until the sled until it is entirely behind the 12.5m mark.
Then, move away from the sled, and come around the other side. Repeat the same steps, pushing the sled in the opposite direction.
Benefits: This technique maximises force transfer with direct body contact to enhance power and speed. Many Pros use this option, particularly male competitors who weigh enough to use their body weight against the sled to drive it along. This technique is generally safer than the previous two methods, as the load is distributed across the body, making it suitable for all levels.
Downsides: Shorter people may not have enough leverage to push the sled along using this technique.
How To Train For The Sled Push
So you know how to do the sled (and have some techniques to try). But when adding weight and performing the sled push under fatigue, you must ensure you’re properly prepared.
To improve your sled push and prepare for race day, you’ll want to cover three main factors in your sled push training.
These are:
Building foundational strength (the strength you need to be able to push the sled along)
Training explosive strength (the power needed to drive the sled along faster and with more ease)
Race-specific preparation (practicing using the sled, including compromised training)
We’ll go into each of these in more detail.
1. Building Foundational Strength
A critical training baseline for the sled push machine is first building foundational strength. As the sled is primarily a lower-body exercise, this should focus mainly on the glutes, quads, hamstrings, and calves using single-leg exercises (as you use one leg at a time to drive the sled forward) and compound lifts (that use multiple muscles at once to build overall strength):
Bulgarian Split squats
Bulgarian split squats target the quads and glutes, which are heavily involved in the sled push. As a unilateral exercise, they also train single leg strength required to propel the sled forward. To keep balanced during Bulgarian split squats, you’ll also need to focus on bracing your core through the whole exercise, which is vital during the sled pull to ensure proper form and prevent strain on the lower back.
How to do Bulgarian split squats:
Select a pair of dumbbells and set your bench to a flat position or select a box that comes up to around knee height.
Stand with the back of your knees against the long side of the bench, then take three steps away from it. Lift one foot and place it onto the bench, with the laces facing down.
Begin the movement by bringing your back knee down until it almost touches the floor. Brace your core throughout, keep your shoulder back and down, and drive your knee out over your toe.
Then, drive through the heel of your front foot, pushing it into the floor, to stand back up.
Tip: Trial a few repetitions without weight first to find the ideal foot positioning for your front leg: when at the bottom of your split squat, your front knee should be bent at 90 degrees, and your butt should come close to the calve of your back leg.
Single Leg Box Step-Ups
Another unilateral leg exercise that trains the quads, glutes, hamstrings, calves, and core, as well as the hip stabilisers (adductors and abductors), box step-ups involve full hip and knee extension, which is crucial for generating force in each step when pushing the sled.
These can be done bodyweight (but once you are confident with the exercise, we recommend loading these with two dumbbells, kettlebells, or even a barbell. Don’t be afraid to go heavy, as long as you can perform these well and fully extend the hips at the top of each rep.
How to do single-leg box step-ups:
Stand facing a sturdy box or bench that’s about knee height. The feet should be hip-width apart.
Place one foot fully on the box, heel flat, and toes pointing forward. Your other foot stays on the ground.
Press through the heel of the foot on the box, engaging your quads and glutes. Drive your body up until your standing leg is fully extended. The non-working leg should come up naturally to rest on the box next to the working leg but should not push off the ground to get there.
Then, keep the weight on the working leg, lift the other leg off the box, and lower it back to the ground (keep this slow and controlled!).
Once the foot is fully on the floor, lift the other leg off the box and bring it to the ground, returning it to the starting position.
Repeat, lifting the other leg first to step on the box.
Continue alternating legs until you have done 10 to 15 reps on each leg.
Tip: Keep your knees aligned with your toes as you step on and off the box. Be careful not to let your knees cave in. Also, be conscious that your working leg (the first leg that steps up) does all the work for that rep. Squeeze your glutes and core throughout.
Barbell Back Squats
While single-leg exercises should be your focus for building strength for the sled push, compound movements also help build overall body strength and stability.
Barbell back squats heavily engage the quads, glutes, and hamstrings, training explosiveness and power to drive out of the hole. They mimic the ‘push off’ motion needed to maintain momentum throughout the sled push. Using a barbell also allows you to lift heavy, maximising strength gain and power development to prepare you for race day.
How to do barbell back squats:
Set up the barbell in the squat rack, just below shoulder height.
Place your hands on the bar, just outside of shoulder width. Move underneath the bar, resting it on your upper back and placing your feet directly below you, hip-width apart.
Stand fully upright, unracking the bar. Take two steps back and place your feet in your squat stance, feet just outside of hips, toes pointing forward or slightly out.
Take a deep breath into your belly, and squat down, driving your knees out and keeping your chest up.
Lower until your thighs are parallel to the floor (or as close as possible). Pause briefly, then press through your feet to return to standing, squeezing your glutes at the top.
Repeat for the prescribed rep range, then walk the barbell back into the rack to re-rack it.
Tip: Breathing and bracing are very important on back squats (just as they are on the sled push). Before descending, take a deep breath into your stomach, bracing and holding your breath as you lower down. As you ascend, exhale forcefully to help drive you out of the squat's sticking point (the most challenging part).
2. Train For Explosive Strength
In addition to strength-building exercises, you will benefit from including exercises aimed at increasing power generation and explosively, such as plyometric exercises. These will help improve both strength and speed, important during the sled push exercise [1,2]:
Box Jumps
Box jumps primarily work the quads, glutes, and calves. They train triple extension (simultaneous extension of the hips, knees, and ankles), a powerful motion essential to propelling the sled forward. Box jumps engage fast-twitch muscle fibres, which are responsible for explosive movements and are heavily required when pushing the sled!
How to do box jumps:
Select a box (the standard height for women is 50cm / 20 inches and 60cm / 24 inches for men, but start with a lower box to build confidence and proper form before progressing to a higher box).
Stand about one foot away from the box with your feet hip-width apart.
Bend your knees slightly and hinge your hips into a quarter squat, swinging your arms behind you. Keep your chest up and your back straight.
Explosively jump upward by driving through your heels, extending your hips, knees, and ankles (triple extension). Swing your arms forward and up to help propel yourself.
Land both feet softly on the box, hip-width apart, with a soft bend in the knee. Both feet should be fully on the box (the heels should not be off the edge of the box).
Fully extend the hips, standing up and squeezing your glutes.
Step down one foot at a time back to the starting position before repeating.
Tip: Be conscious of fully extending your hips at the top of every rep. Don’t rush these, but keep them controlled.
Broad Jumps
Broad jumps develop horizontal power, mimicking the forward propulsion to push a sled. They also build strength and power in the hips, glutes, and quads, making them a great exercise for developing the sled push.
How to do broad jumps:
Stand with feet hip-width apart and knees slightly bent.
Swing your arms back, bend your knees slightly, and push your hips back. Then, keep your chest up and look ahead of you.
Explosively jump forward as far as possible, pushing through your heels and extending your hips, knees, and ankles, swinging your arms forward as you do so to generate momentum.
Land softly with knees bent to absorb the impact. Make sure your feet are shoulder-width and knees aligned with your toes.
Stand full, reset, and repeat for several reps or a set distance.
Tip: As you get more advanced, progress broad jumps so that you are immediately bound onto the next as soon as you land to improve your rhythm and power further.
3. Race-specific preparation
Of course, if you’re training for a Hyrox, you’ll want to practice some race-specific training.
Ideally, this means practicing pushing a sled. There are two main ways should do this:
Practice Using The Sled In Isolation
Using the sled as a stand-alone exercise is the ideal time to practice your pushing technique, determine which is most comfortable for you, and get used to the weight you’ll be pushing.
Start off light to get the form and technique, and slowly progress up to a weight heavier than your race day weight, using progressive overload to build your weight weekly. The reason for doing this is that the carpet used during Hyrox races can cause drag on the sled, making it feel heavier than it actually is. Also, when you push the sled on race day, you’ll be pushing it under fatigue–again, making it feel harder.
Practising with a weight greater than your race day weight makes you better prepared and will make it feel a little easier when the clock is on.
There are several ways you can split your sled workout:
By distance (i.e., push the sled for the length of the track or 20m), then rest for 30-60 seconds before repeating 4 to 6 times.
By time (e.g., push the sled for 1 minute, then rest for 30-60 seconds before repeating 4 to 6 times).
Repeat as many times as you want, resting between sets.
You can progress the difficulty by increasing the sled weight, decreasing the rest time and increasing the working time, or increasing the number of rounds.
Practice Using The Sled Under Fatigue
Practising the sled on its own is a good tactic, but do not underestimate the necessity of practising the sled push under fatigue! Pushing the sled when you are fresh is a whole different story from shifting it when you’ve run 2K and ski-ed!
Make things easier for yourself by training under fatigue and practising running compromised before and after your sled push. Do this as soon as possible in your training to prepare for your race.
Can I Train For Sled Push Without A Sled?
If you don’t have a sled, don’t worry: The treadmill can be used as a sled push alternative.
Many newer treadmills have a ‘sled push’ functionality built in. They allow you to set the weight of your ‘sled’, grip the front bar or rail, and use your legs to turn the belt. You can even set an incline to increase the difficulty.
If your treadmill doesn’t have a sled setting, you can still replicate the feeling of a sled push by driving your legs on the treadmill belt when it is turned off. Because the treadmill is not switched on, the belt provides resistance and helps to replicate the feeling of a sled push.
That being said, we advise that you practice using a sled at least once (if not more) before your race to get a feel for the technique and so you can be clear about exactly which one you are using on race day. To do this, drop in at a local Hyrox Training Club before your race day.
Failing this, the Hyrox warm-up area on race day will have sleds available for practice, so if you need to get some pre-race prep in, make sure you arrive early enough to do so.
5 Tips To Improve Your Sled Push Form
1. ‘Push Off’ With Two Feet
The ‘push off’ phase, i.e., getting the sled moving, is the most difficult part of the sled push. It requires good strength and power to get the momentum going. It’s often easier to push off with two feet to maximize power and to lean into the sled, putting your whole body behind it and driving the floor away with your feet.
2. Optimise Your Stride Length
Small, controlled steps will help you maintain momentum and control over the sled. Taking overly long strides could disrupt your balance and limit the force you can push the sled.
3. Take Rests If Necessary, But Be Consistent
Ideally, try not to stop until you’ve crossed the finish line in each 12.5m segment, but If you need to stop, be consistent. If competing solo, go halfway, stop, take a breather, then do it again. If competing in doubles, try to do one length each, or switch halfway (as Hyrox world record holder, Lucy Davis, and her sister Meg Davis do in our Women’s Pro Doubles).
4. Don’t Go Out Too Fast
In a Hyrox race you are only about 20% through by the time the sled push comes around. If you go out too fast and gas yourself out, you’ll take more time to recover, which may mean you have to stop more, impacting your overall time. Slower is better.
5. Train With A Sled Push Weight Heavier Than Your Race Day Weight
The floor that you’ll have to push the sled along on race day is notoriously difficult, creating a lot of friction to make the sled feel heavier than it actually is. Prepare for this by practicing with a heavier-weight sled than on race day.
FAQs
What Are The Benefits Of Doing The Sled Push?
Aside from mastering the sled push to improve your Hyrox race time, there are many benefits to sled push training:
A full-body exercise,
the sled push works the quads, glutes, hip flexors, calves, hamstrings, core, triceps,
chest, and shoulders, building strength, power, and endurance in multiple muscles at once.
Promotes high-calorie burn: A 2011 study found that high-intensity sled training significantly increased post-exercise oxygen consumption (EPOC), which leads to greater calorie expenditure during and after the workout [3].
Improves strength: A 2021 study measured significant increases in strength after 6 weeks of sled push training for low-volume, higher-weight sled pushes and high-volume, lower-weight training, demonstrating that either weight variation can improve strength [4].
Increases speed: A 2019 study of 50 high school athletes found that any amount of loaded sled increases sprint performance, with heavy loads pushed short distances producing the greatest increases after 8 weeks of pushing the sled twice a week [5].
Develops explosive power and jumping performance: A 2024 study on male basketball players found that sled pushing twice a week over five weeks improves anaerobic training, particularly horizontal jumping [6]. This sled push could be an important training method for many sports that include sprints, quick changes of direction, or driving into an opponent, such as football, tennis, rugby or mixed martial arts [4].
What Muscles Does The Sled Push Work?
The sled push is a full-body movement, targeting upper and lower body muscles. That being said, most of the onus is on the legs as the main power-driver in the movement–namely the:
Glutes
Quads
Hamstrings
Calves
The core is also essential during sled pushes; you must adequately brace it to protect the lower back.
The shoulders and triceps are stabilisers during this exercise, helping keep the body steady.
The sled push is comparable to the back squat in the amount of muscle activation in the quads, hamstrings and core (as proven by a 2014 study on 10 healthy resistance-trained men), but was found to result in greater activation in the calfs for the sled push [7].
How Heavy Is The Sled Push In Hyrox?
The Hyrox sled push weight depends on your entry category and gender. The plates are automatically loaded on the sled for you before you reach the station.
The weights for the entry categories are as follows:
Women: 102 kg, including the weight of the sled
Women Pro: 152 kg, including the weight of the sled
Men: 152 kg, including the weight of the sled
Men Pro: 202 kg, including the weight of the sled
Mixed Doubles: 152 kg incl. sled
Women Doubles: 102 kg incl. sled
Men Doubles: 152 kg incl. sled
Relay: 102 kg /152 kg (F/M) incl. sled
What’s The Difference Between The Sled Push Vs Sled Pull?
Both the sled push and sled pull use the sled with loading plates to build strength and power. But while the sled push involves propelling the sled forward, the sled pull uses a rope, straps, or belt to pull the sled toward you.
In a Hyrox race, you’ll have to tackle both, with the sled push coming after the second 1K run and the sled pull coming after the third 1K run.
Key differences between the two are:
The sled push relies on a pushing motion, relying on your legs to drive the sled forward. On the other hand, the sled pull requires greater upper body strength to pull the sled toward you.
Due to this, the sled push is more anterior-muscle focused (chest, shoulders, triceps, and core), while the sled pull engages more of the posterior chain (back, biceps, and erector spinae) [8].
In Hyrox, the sled push is heavier than the sled pull. However, you’ll be more fatigued when performing the sled pull, which comes after the sled push (and 3K of running!).
How Often Should I Do Sled Pushes?
Aim to practice sled pushes once or twice a week (ideally twice if these are your weak points).
Begin by focusing on technique and adjusting to the feeling of pushing the sled before adding it to your workouts and increasing the weight. Ideally, the more training you can do, the better, but always be aware of giving yourself enough recovery between sessions to avoid overtraining. This means spacing your sled push training out by 48 hours.
Time To Get Training
The sled push might seem intimidating at first, but with the right technique, strength training, and smart pacing, there’s no reason you can’t conquer it.
Whether you're adding it to your gym routine or preparing for race day, the key is consistency—both in training and execution. Focus on controlled, powerful strides, maintain your form, and don’t let fatigue dictate your pace.
Stay focused, trust your training, and push through.
From the perfect doubles matching sets to sports bras to withstand every burpee broad jump or shorts flexible enough to move through each lunge, we’ve got the functional fits you need for race day.
References:
Pardos-Mainer, E., Lozano, D., Torrontegui-Duarte, M., Cartón-Llorente, A. and Roso-Moliner, A. (2021). Effects of Strength vs. Plyometric Training Programs on Vertical Jumping, Linear Sprint and Change of Direction Speed Performance in Female Soccer Players: A Systematic Review and Meta-Analysis.
Ramírez-Campillo, R., Andrade, D.C. and Izquierdo, M. (2013). Effects of Plyometric Training Volume and Training Surface on Explosive Strength.
Howard, N. and Stavrianeas, S. (2017). In-Season High-Intensity Interval Training Improves Conditioning In High School Soccer Players.
Bernard, J.R., Liao, Y.-H., Madrigal, C.O., Levesque, J.D., Fraze, M.B., Toro, I.D. and Lee, S. (2021). The Effects of Low Volume Versus High Volume Sled-Push Training on Muscular Adaptation.
Cahill, M.J., Oliver, J.L., Cronin, J.B., Clark, K.P., Cross, M.R. and Lloyd, R.S. (2019). Influence of resisted sled‐push training on the sprint force‐velocity profile of male high school athletes.
Gottlieb, R., Levi, A., Shalom, A., Gonzalez, J.C. and Meckel, Y. (2024). The Use of Sleds as a Unique Training Technique for Anaerobic Performance Development among Young Basketball Players.
Maddigan, M.E., Button, D.C. and Behm, D.G. (2014). Lower-Limb and Trunk Muscle Activation With Back Squats and Weighted Sled Apparatus.
Cahill, M.J., Cronin, J.B., Oliver, J.L., P. Clark, K., Lloyd, R.S. and Cross, M.R. (2019a). Sled Pushing and Pulling to Enhance Speed Capability.